Sunday, January 22, 2012
T-Shirt to Bag
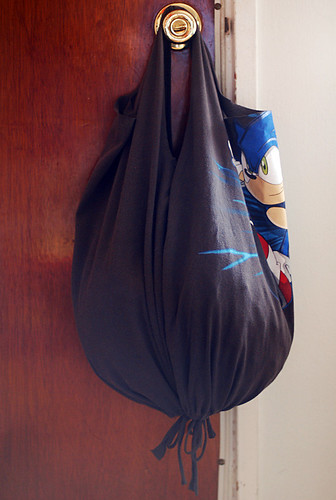 I love my cloth shopping bags, but this is another great way to use old t-shirts that have seen better days. Lethal has a great and detailed explanation on how to recycle a t-shirt into a shopping or gift bag in 5 minutes with no sewing.
 Thursday, January 12, 2012
Natural Tie Dye

With a few extra shirts left over, I took this opportunity to show the kids that fabric can be colored using natural ingredients that we have here in the house. We used directions from Itty Bitty Impact to dye the "new" wipes and extra shirts. Using turmeric and coffee grounds, they turned out awesome shade of yellow!
Tuesday, January 10, 2012
Making a Wetbag
 |
| Bathroom wetbag and "cotton" pads/balls |
Used a lot by cloth diapering families, these waterproof/water resistant bags are a great way for our family to temporarily store our soiled items until I have time to do laundry. I saw a pictures on Etsy but just wasn't willing to pay the price for something I new I knew I could do myself. I used the directions for making a lined tote/purse from Home Ec 101 (http://www.home-ec101.com/make-it-this-weekend-basic-lined-totepurse/).
 |
| Kitchen wetbag & tie dyed wrag |
So far, it has been easy to use and my family has been using it without any problems.
Thursday, January 5, 2012
Dryer Balls/Sheets
 |
| Felted dryer balls - Weegrayz |
So far I've tried the following with mixed results:
1) Vinegar ball in old Downey ball - this has been quite useful, but the balls keep disappearing. The other problem has been static...not always effective on my clothes.
2) Crocheted fabric sheets. I was soaking these in vinegar before putting them into the dryer. The first few times they worked well, but was not very easy to use if doing multiple loads of laundry in a single day. The yarn did not have the ability to soak up enough vinegar.
3) Tin foil balls - These have been somewhat effective for static and reducing drying time, but not for softening clothes. To make these:
- Tear off 3 sheets of aluminum foil approximately 12" each
- Crumble the first sheet into a ball as tightly as possible.
- Crumble the next sheet over the first creating a bigger ball.
- Crumble the third sheet over the first 2 creating a final ball.
- Throw these in the dryer with your wet clothes.
Surprisingly, after each use, the balls continued to get smaller and tighter until they looked like giant marbles.
4) Wool Dryer Balls - I haven't tried these yet, but they look promising...softens fabrics without chemicals, adds fragrance (if added), and reduces static. They can be purchased from Heynacart.
 |
| Loving Touch Wet Bags - 6 Dryer Balls from Redhead and Blue |
Here's what you'll need:
- A few balls of wool. The amount of wool needed will depend on the weight of the wool and how tighly you wind. I used 1 ball of wool to make 1 dryer ball (including the core). Make sure that the yarn you're using is 100% wool or it won't felt properly.
- Old pantyhose or socks
- A small amount of non-wool string (cotton or acrylic both work fine)
- Scissors
- A crochet hook (optional)
If you've ever wound wool into a ball, this is pretty well the same thing but in two stages. Just make sure to wind the wool tighter than you ordinarily would.
Step 1: Starting the core
Start by winding the a bit of wool around two fingers

When you've got it about a half inch across (the size doesn't really matter), pull it off your fingers, let the loop close and then continue wrapping the wool around the middle of the loop. This is the start of your ball.

Step 2: Wrapping the core
Continue wrapping the wool around, turning the ball slightly every few loops or so. You don't need to be neat about this first bit since it won't be visible once your ball is finished. Once the ball is 4-5 inches around, cut the wool and tuck in the loose end. This can be more eaily done if you've got a crochet hook but can also be done with your fingers.
Step 3: Stuffing the pantyhose
Next, put your ball (or balls, depending on how many you're making) in the pantyhose. Tie them off between each one with your cotton or acrylic string.

Step 4: Washing the ball cores
Throw the balls in the machine with your laundry. The hotter you wash them, the more quickly they will felt. If you put them through on hot, it should only take the once. Put them through the dryer once, cut the strings tying them into your pantyhose and pull out your balls.
Step 5: Beginning the outer ball
Begin winding more wool onto the ball. You don't need to do anything to attach the wool to the ball. Just hold it down with a finger as you wrap until it stays on it's own.

Step 6: Winding the outer ball
Continue winding your ball until it is as big as you want it. I made mine to be slightly larger than tennis balls so that they would shrink down to tennis ball size as they felted. Repeat Steps 3 and 4 and your dryer balls are ready for use!
Reusable Cotton Balls
 Now I'm going to have to try these!! We don't use many cotton balls in our house, so having a big bag of fluffy balls floating all over the floor is enough to drive me nuts! The idea of nice, neatly contained re-usable (and thereby earth- and pocketbook-friendly) cotton swabs is a perfect idea for me.
I saw these on My Happy Crazy Life and thought that this would definitively be something I could do.
If you don't want to make them, Amazon sells a brand called Better for Grownups Organic Cotton Rounds.
*** UPDATE ***
I don't know why I haven't tried these earlier! They are the perfect size for washing your face, removing nail polish, etc. I was able to make 12 in 45 minutes using flannel material I already had. Each square was cut into a 4 in x 4in piece. Wrong sides sewn together with 1/4 in. seam; turned and top stitched. Since they were so easy to make, I have them in glass tumblers in both bathrooms.

Tuesday, December 20, 2011
tomipaige@gail.com sent you a link to content of interest
Olive Oil Crackers
http://www.101cookbooks.com/archives/olive-oil-crackers-recipe.html
Now this looks like a yummy treat!
--
http://www.101cookbooks.com/archives/olive-oil-crackers-recipe.html
Now this looks like a yummy treat!
Olive Oil Cracker Recipe
If you have trouble tracking down semolina flour, just substitute white whole wheat flour (or all-purpose flour), it will be make a slightly different cracker but should still work. To get creative with your crackers you can top them with lots of things before baking: freshly grated cheese, artisan salts, cornmeal, a dusting of your favorite spice blend, seeds, or a wash of your favorite flavored or infused oil. You can simply cut the unbaked cracker dough into various shapes using one of those pizza cutting wheels.
1 1/2 cups semolina flour
1 1/2 cups white whole wheat flour (or all-purpose flour)
1 teaspoon fine-grain sea salt
1 cup warm water
1/3 cup extra virgin olive oilspecial equipment: pasta machine (optional)
Whisk together the flours and salt. Add the water and olive oil. Using a mixer with a dough hook attachment mix the dough at medium speed for about 5 - 7 minutes. Alternately, feel free to mix and then knead by hand on a floured counter-top. The dough should be just a bit tacky - not too dry, not too sticky to work with. If you need to add a bit more water (or flour) do so.
When you are done mixing, shape the dough into a large ball. Now cut into twelve equal-sized pieces. Gently rub each piece with a bit of olive oil, shape into a small ball and place on a plate. Cover with a clean dishtowel or plastic wrap and let rest at room temperature for 30 - 60 minutes.
While the dough is resting, preheat your oven to 450F degrees. Insert a pizza stone if you have one.
When the dough is done resting, flatten one dough ball. Using a rolling pin or a pasta machine, shape into a flat strip of dough - I can usually get down to the 4 setting on my pasta machine w/o trouble. Pull the dough out a bit thinner by hand (the way you might pull pizza dough). You can also cut the dough into whatever shape you like at this point. Set dough on a floured (or cornmeal dusted) baking sheet, poke each cracker with the tines of a fork to prevent puffing, add any extra toppings, and slide into the oven (onto the pizza stone). Repeat the process for the remaining dough balls, baking in small batches. If you don't have a pizza stone, bake crackers a few at a time on baking sheets. Bake until deeply golden, and let cool before eating - you will get more crackery snap.
Makes a dozen extra large crackers.
--
Subscribe to:
Posts (Atom)